Winter is coming. Three words that Game of Thrones fans think they invented. But beekeepers have been dealing with these words for decades as they prepare for winterizing their bee hives.
For many beekeepers, the thought of winter brings an ominous feeling.
Whereas individual workers drop dead from exhaustion every day, the colony, which is a superorganism, can also meet its demise from natural causes. Winter is one of the top causes of dead bees.
Let’s get something straight, though, before we dive into winterizing bee hives.
Bees have been getting through winter for thousands of years. Winter isn’t new to them, but our hives are.
Our agricultural practices have altered their environment so much. That’s something new to contend with.
We also started shipping things all over the world and brought some nasty little critters, such as the varroa destructor mite, to their doorstep.
That wasn’t something these European bees had to worry about 1000 years ago. All these factors have caused their natural winter processes to malfunction. Since we caused the problem, it is now upon us to help them through by preparing beehives before the cold weather descends.
What Happens to Bees in the Winter?
If you didn’t have to work, what would you do in the winter? I would move to a cabin in the woods with a stack of best sellers and a magical fairy who kept the fire burning in the chimney all through the cold weather.
Oh, and of course, a four-month supply of food stores so I’d never have to leave my cozy wonderland until jack frost’s reign was over.
The honey bees share my vision.
They spend the fall gearing up for winter. They collect nectar and work really hard to cure it before the temperature falls too low. Prior to the winter months, they had to make sure they had enough food stores to keep them fed when they could not go out to forage.
The queen lays eggs to get workers who will see her through the winter. These ladies can live for 6 months, unlike their sisters, who only make it to six weeks.
Eventually, the queen stops laying eggs altogether, which ensures that the stored honey will be enough to get them through the winter. And then, the colony comes in for a 4-month-long cuddle, with a few bathroom breaks for hygiene.
Banding together for warmth makes them form a winter cluster. The cluster moves together and uses its wing muscles to vibrate and generate heat to keep the winter bees warm. The bigger the cluster, the warmer the bees are. It also keeps the hive warm in the cold months.
The heat and moisture generated by the cluster also enable them to feed.
As you can imagine, it can get pretty frosty in the northern states, and honey is difficult to eat frozen.
However, the heat generated by a cluster rises and thaws out the honey above the cluster. By the time they get to the honey, it’s not too cold; it’s not too hard, it’s just right.
The cool temperatures also reduce the amount of activity in the hive. The less they do, the less honey they need, keeping winter feeding to a minimum.. This is the bee equivalent of lying on the sofa with minimal movement. This way, although they don’t hibernate, they are pretty inactive.
When to Start Winterizing Beehives
Winter preparations begin early, even before the cold climates set in. Once July is over, you really need to get going to ensure your bees survive the winter.
You have to make sure the mite count is way down. Additionally, the pantry has to have adequate food stores for the honey bees to make it through the cold winters.
Although you will need to keep an eye on the colony and check on them from time to time, you want to minimize the number of times you need to open the hive entrances. This would help prevent cold air from coming into the hives.
A thermal camera may aid you in this task of looking after the colony without opening the hive too much.
Stores can be checked by weighing the box. The size of the colony will determine the amount of honey they need.
In addition to that, the severity of the winter will also determine how much honey they’ll need. During more bitter winters, they may need to stay indoors longer.
Even when the landscape starts to thaw out, the blooms are still not available to provide nutrition for our little workers.
In fact, many beekeepers lose their colonies at the beginning of spring.
Sometimes, the sun comes out, and the colony starts to exercise those wings. By going out to rediscover their environment, they burn through even more food. By this time, the queen bee has begun laying eggs, meaning there are more mouths to feed.
Why Winterizing Beehives is Important
In order to get the formula that works for you, you need to find out how much honey the local beekeepers in your area regard as sufficient.
In a good year, the fall nectar flow will be sufficient to set up your bees for the winter. Unfortunately, that isn’t a guarantee.
So if the spring nectar flow was sufficient, you might need to sacrifice a few honey frames from your honey harvest. If sacrificing honey doesn’t seem acceptable, then your final option is to provide the bees with syrup for them to store.
That cannot be done when the temperature drops too low. When the syrup is less than 50°F, the bees won’t touch it. Even if they did, it would be very difficult to cure for long-term storage.
If the bees can’t dehydrate it, then the chances are that it will spoil, and the bees may starve surrounded by low-class mead.
Let’s not forget about our 8-legged villains, the mites. You need to control the mite population before winter arrives.
If you don’t, the workers that are expected to care for the colony during the winter will be unhealthy. Mites carry vectors with them and weaken the bees’ immunity system by feeding on their hemolymph. Having a weaker colony will surely result in your honey bees not surviving the winter.
Some mite treatments are sensitive to warm temperatures. Thymol, for instance, needs to vaporize to be effective. If you administer it when it’s too cold, the oil doesn’t vaporize, and it’s not effective.
This is important because the fight against varroa mites has only started to sway in our favor because beekeepers are alternating treatments. We are encouraged not to use the same treatment twice in a row, so you are likely to find yourself using a temperature-sensitive treatment at least once every few years.
In summary, once the fall begins, it’s time to start making the long winter plans.
Winterizing Beehives - Step by Step
Step 1: Determine if a Mite Control Treatment is Needed
First, we tackle the health of your bees. You need to establish if you need to do a mite treatment.
To do this, you need to do a mite count, best done through an alcohol wash. You will need a cup full of nurse bees, some rubbing alcohol, and some containers.
Feel free to ask for help the first time you do this.
It is important that you get nurse bees because they are more likely to carry varroa.
The mites need a brood to procreate, and nurse bees are always around the brood nest, so naturally, the mites hitchhike around the hive using nurse bees as their primary vehicle.
The alcohol wash will give you an approximation of the number of mites in the hive. The threshold for acceptable mite populations varies from one apiary to another.
Once you work out what the maximum acceptable count is, then you will know whether treatment is necessary.
If the count is high, you need to treat the hive. Most beekeepers agree that August is the best time to treat hives of mites. It gives the colony a chance to build healthy workers for the winter before the queen stops laying eggs.
If the treatment is done too late in the winter season, then the brood expected to take the colony through the winter will probably be infected with various viruses. You will have a weak colony, and your honey bees will most likely die despite your best efforts.
Step 2: Assess Honey Stores
Is the fall nectar flow sufficient to get your bees through the winter? You need to talk to other beekeepers in your locality.
The beekeepers association will be a valuable asset to guide you on how much winter stores is likely to be needed and whether the local flora is capable of delivering enough nectar to your bees.
For instance, in the case of a double-deep brood colony, you will have about 80 pounds of honey*.*
If the season’s nectar flow isn’t sufficient, your options are to keep some honey aside from your summer harvest or feed your bees in the fall.
When making the syrup, the ratio of sugar to water should be 2:1 or 5:3. The idea is to feed the bees with a solution that requires little energy to cure. A lighter solution is more suitable for spring.
If the temperature drops too low, the bees will not be able to consume the syrup, and you’ll have to switch to solid alternatives such as candy boards and powdered sugar.
Step 3: Remove Unnecessary Bee Furniture
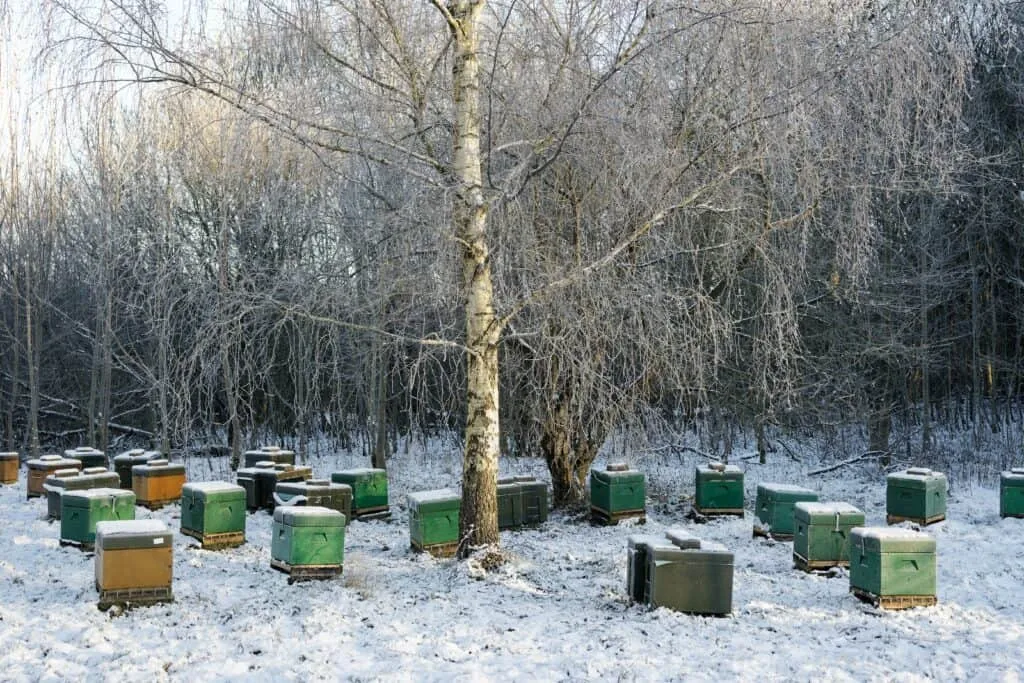
The bigger the space, the harder it is to keep warm. So turn that hive from an auditorium to a little cabin. Make sure the empty boxes and supers are off. If the colony is small, move them to a nuc that is smaller or combine them with another colony.
Also, remove the queen excluder. Queen bees don’t eat honey, but they need warmth from the rest of the colony to survive. As the winter cluster eats its way up, queens would be separated by the queen excluders, and they would eventually die. You can either remove it altogether or place it above the inner cover.
Step 4: Protect Your Beehives From Prevailing Winds
There are several things you need to do here.
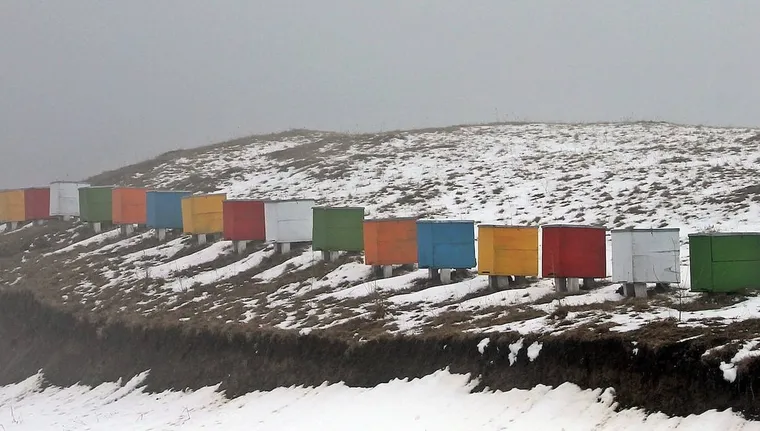
One, ensure that the entrances of your hives are facing away from the wind. You don’t want a sharp breeze chilling your colony after you’ve worked so hard to keep them alive.
Second, create a windbreaker for your apiary. You could use hay bales or bales of straw. Or, you can move the hives behind a tree line. Or, you may want to provide insulation or wrap for your hives. And still, you could build a temporary snow fence.
The only problem with the latter option is that you have to take it down when the season is over and up again next fall.
Step 5: Prepare Mouse Guards
In winter, everyone is looking for a nice warm place to keep them from hypothermia. Mice happen to be on that list, and they find the cozy inside of a hive as prime winter real estate.
Now, this arrangement would be tolerable if the mice didn’t destroy the furniture. They can really do a lot of damage to the combs and the hive bodies.
You want to keep them out of the hive by making a mouse guard. You can make your own mouse guard using some 1/4” hardware cloth.
Another alternative would be to reduce hive entrances, just enough for bees to pass through but not other animals. An entrance reducer can be just as effective, and you can use it all year round.
Step 6: Prepare Ventilation and Moisture Control
When it’s cold, we close all the doors and windows and come very close to shrink-wrapping the entire house to keep warm. Well, we would if we didn’t have indoor heating. The temptation to do that to a hive is probably high, but ventilation is vital to the survival of the colony.
Without proper ventilation, the moisture in the hive would build up. Excess moisture would create a drip that would fall down on your bees, chilling them to death. It also causes mold to grow in the hive. Even though this doesn’t kill the colony, that level of moisture is so unhealthy for the bees that they would probably die anyway.
Introduce an upper entrance. This provides a vent for the moist, warm air to escape. It also provides an exit for the bees to take cleansing flights, a fancy word for bathroom breaks when the lower entrance is blocked with snow.
You also need something to absorb some of that moisture while providing insulation. Some straw or wood shavings between the inner cover and the outer cover would work perfectly.
Depending on the size of the colony, you may need to change this insulation during the winter to keep the straw/wood shavings from getting waterlogged.
Final Thoughts
Bees have been getting through winter for a lot longer than we have been around, but we have altered the environment so much that their tricks don’t work as well in the new world as they did in the old.
The guide above will help you help your bees survive the winter frost just like they used to in the old days.
I have 1 top bar hive. And 7 other hives. I'm not sure how to winterize the top bar hive.
"Depending on the size of the colony, you may need to change this insulation during the winter to keep the straw/wood shavings from getting waterlogged."
My impression has always been that you never want to open the hive during winter, since precious heat will escape. I'd say just make sure the hive is adequately ventilated and that shouldn't be necessary.
Hello. Thank you for your wonderful info. I am a first year beekeeper. This will be my first winter. I installed the mouse guards in late September. When should I put entrance reducers back on behind the mouse guards?
I don't think the entrance reducers are necessary if your mouse guard is on.